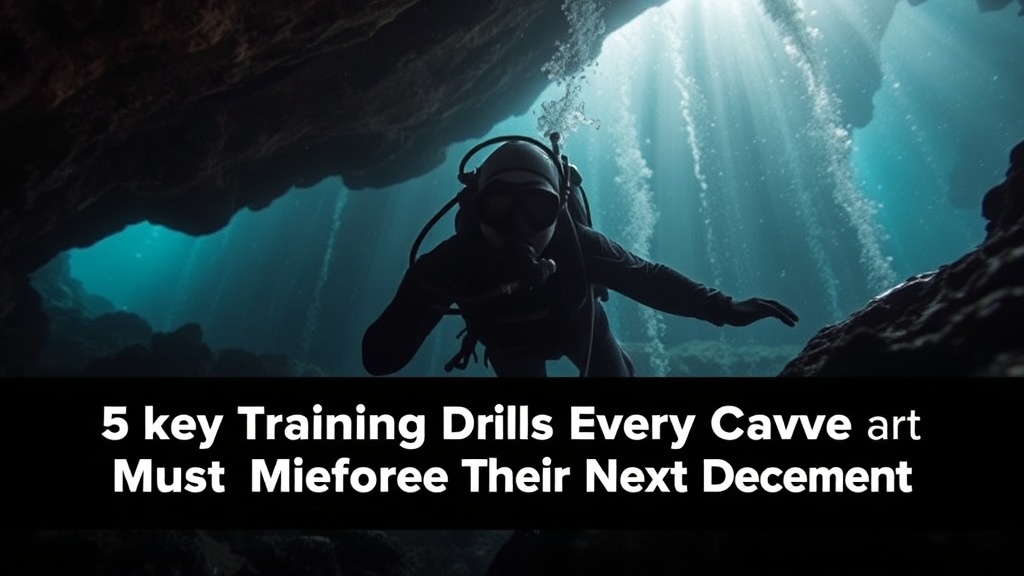
5 key Training Drills Every Cave Diver Must Master Before Their Next Descent

Zero-Visibility Line Following Drills
Precision Buoyancy and Trim Control Sessions
Stress Inoculation and Emergency Protocol Rehearsals
Endurance Finning and Propulsion Technique Work
Equipment Failure Simulation and Redundancy Practice
Cave diving sits at the intersection of physical stamina, mental discipline, and technical precision. This post breaks down five training drills that every cave diver should rehearse regularly—skills that keep you alive when visibility drops to zero, your primary light fails, or your gas supply runs low. Master these drills, and you'll enter the overhead environment with the confidence that comes from muscle memory, not luck.
What Training Drills Do Cave Divers Need to Master?
The five core drills are S-drills and bubble checks, zero-visibility line following, gas-sharing protocols, reel and line deployment, and stage bottle management. These aren't one-time certification exercises—they're habits that demand repetition in a controlled setting before every serious descent.
1. S-Drills and Bubble Checks
S-drills (short for "stress drills" or "safety drills," depending on who trained you) form the foundation of every cave dive. The sequence starts the moment you enter the water. You'll check that your long hose is properly routed, that your backup lights are accessible, and that your wing inflates and deflates without sticking. Then comes the bubble check—exhaling slowly while your teammate watches for leaks around your first stage, hoses, and drysuit seals.
Here's the thing: most gear failures announce themselves early. A free-flowing regulator, a leaking LP inflator, or a sticky wing inflator valve will show up during an S-drill if you're paying attention. Skipping this step because "you checked everything on the surface" is a shortcut that catches up with people. Do it every single time. It takes two minutes. (Two minutes that could save an entire dive—or a life.)
Tomás Park runs cavediving.blog out of Austin, where the local springs get crowded on weekends. Even at busy sites like Ginnie Springs or Blue Spring Park, there's no excuse for rushing the S-drill. Find a quiet corner of the basin, signal your buddy, and run the checklist methodically.
2. Zero-Visibility Line Following
Cave divers don't swim into the dark without a guideline. But what happens when silt kicks up and you can't see your hand in front of your mask? That's where zero-visibility line following becomes non-negotiable. You'll practice this drill blindfolded (or with a blacked-out mask) in open water or a shallow cavern zone, tracing the line by feel alone.
The technique sounds simple. It isn't. You need to maintain contact with the line at all times—usually a finger-thumb slide along the permanent cave line—while managing your buoyancy by feel and monitoring your breathing rate. The catch? Panic rises fast when you lose visual reference. The only antidote is repetition. After enough practice, your heart rate stays steady even when the world disappears into brown soup.
Start in a pool or shallow spring with a fixed line. Have your instructor or buddy place obstacles along the route: line arrows, cookies, junctions, and gaps. Learn to read the line's story with your fingertips. A line arrow points home. A cookie marks the exit direction at a junction. Missing these details in zero visibility is how divers get turned around.
3. Gas-Sharing and Out-of-Gas Protocols
Running out of breathing gas inside a cave is every diver's nightmare. The standard response—donating your long hose to your teammate and switching to your backup regulator—must be automatic. That means practicing gas-sharing drills until the motion feels as natural as tying your shoes.
In a typical scenario, the diver with the problem signals "out of gas" with a slashing motion across the throat. The donor hands over the primary regulator (attached to a seven-foot hose), switches to the backup second stage, and maintains physical contact. Both divers then initiate a controlled exit along the guideline without ascending faster than their decompression obligation allows.
Practice this drill at depth, in trim, and while following a line. Don't just hover in open water and swap regulators. Simulate the stress: close a valve mid-dive (under supervision), black out a mask, or introduce a simulated entanglement. The more realistic the rehearsal, the less your brain freezes when it happens for real.
"The best cave divers aren't the ones who never have problems. They're the ones whose training takes over before conscious thought even kicks in."
4. Reel and Line Deployment
Primary reels, jump reels, and gap reels are your breadcrumbs in the cave. Deploying them cleanly—without tangling, without sagging, without wrapping around stalactites—is an art form. Poor line laying turns a simple exit into a navigational mess. Worse, it endangers every diver who follows behind you.
Practice deploying a reel while swimming in perfect horizontal trim. The line should run taut behind you, about three feet off the bottom. Learn to tie off at the primary tie-off point, manage the spool with one hand, and maintain buoyancy with the other. When it's time to reel up, the process should be just as smooth. A tangled reel in a restriction is a nightmare you don't want to live through.
Worth noting: different reels behave differently. A Dive Rite Sidewinder handles differently than a Halcyon Pathfinder. Spend time with the specific reel you'll carry on expedition dives. Don't borrow unfamiliar gear the morning of a penetration.
5. Stage Bottle Switching and Management
Longer cave dives require additional gas carried in stage or decompression bottles. Managing these cylinders—clipping them off, switching regulators, stowing the hose, and dropping them at predetermined points—is a drill that demands spatial awareness and coordination.
The standard procedure involves unclipping the stage bottle from your left hip D-ring, bringing it around to your mouth, switching to the stage regulator, confirming gas flow, and then stowing the long hose of your back gas neatly. All of this happens while maintaining trim, depth, and line contact. Drop the bottle too early and you've wasted gas. Drop it too late and you're hauling dead weight through a tight restriction.
Practice stage switches in open water first. Then move to a cavern zone. Then practice them in a simulated zero-visibility scenario. Each layer of difficulty builds the muscle memory you'll need when the cave gets small and the stakes get high.
How Can Cave Divers Practice Emergency Scenarios Safely?
Emergency scenarios should always be rehearsed under the supervision of a qualified cave diving instructor, inside a controlled environment like a spring, sinkhole, or training quarry with established guidelines and rescue support.
There's a difference between pushing your limits and being reckless. Controlled stress inoculation—what military psychologists call "stress inoculation training"—works best when the difficulty ramps up gradually. You don't start by simulating a total silt-out at 200 feet inside a restriction. You start in shallow water with good visibility and a safety diver watching from the surface.
That said, realism matters. If your emergency drills always happen in perfect conditions, you're building a false sense of security. Gradually introduce variables: limited visibility, task loading (carrying a camera or survey slate), physical exertion before the drill, or simulated equipment failures. The Divers Alert Network (DAN) publishes incident reports that show a clear pattern—divers who practiced emergencies in training responded better than those who only read about them in manuals.
Find a training site with permanent lines and known hazards. Weeki Wachee Springs in Florida, Devils Den in Williston, and the NSS-CDS-supported sites in north Florida all offer controlled cave environments where instructors can stage realistic scenarios without pushing students into legitimately dangerous situations.
What Equipment Do You Need for Cave Diving Training?
You'll need a double-tank setup with a reliable manifold, a primary and backup regulator configuration, at least two backup lights, a primary canister light, a properly sized wing and backplate, a drysuit (for most freshwater caves), reels, a dive computer with redundant gas monitoring, and a comfortable use with easily accessible D-rings.
Here's the thing: gear doesn't make the diver, but the wrong gear will fight you during drills. A poorly fitting use turns a stage switch into a wrestling match. A weak primary light makes line following in murky water impossible. Choose equipment that's been tested in overhead environments, not just open-water recreational diving.
| Equipment Category | Recommended Product | Why It Matters for Training |
|---|---|---|
| Primary Light | Hollis LED 1200 Canister Light | Bright, reliable beam for zero-vis line following and signaling |
| Wing / Backplate | Halcyon Explorer Wing with stainless steel backplate | Stable trim and easy gas management in horizontal position |
| Primary Regulators | Dive Rite XT Regulator Set | Smooth breathing, long hose donation configuration, proven in caves |
| Drysuit | Apeks Fusion Tech Drysuit | Warmth and mobility for long training sessions in 72°F spring water |
| Reels | Halcyon Pathfinder Primary Reel + Dive Rite Sidewinder Jump Reel | Reliable line deployment and retrieval without bird's-nest tangles |
Don't chase the newest gadget on the market. Cave diving rewards simplicity and redundancy. A $3,000 dive computer won't help you if you haven't practiced gas-sharing with a standard SPG and depth gauge as backup. Invest in training first. Upgrade gear only when you understand exactly what problem it solves.
Why Is Line Management the Skill That Separates Good Cave Divers From Great Ones?
Great cave divers treat the guideline as their lifeline—not just a convenience—and they've drilled line management until it becomes unconsciously competent.
Anyone can swim into a cave on a good day with clear water and a well-lit line. The difference shows up when things go sideways. A great cave diver can find the line after an accidental disconnect. They can tie a line arrow one-handed while holding position in a current. They can reel up 500 feet of line in a silt-out without panicking when the spool jams.
Line management also means respecting the cave. A sloppy line laid across a fragile soda straw formation damages the environment and creates hazards for the next team. Good line laying is a sign of a diver who thinks ahead—someone who considers not just their own exit, but the safety of everyone who follows.
Practice line management drills monthly, even if you're not planning a cave dive that week. Wrap a line around a chair leg in your garage and practice tying a bowline one-handed. Run reel drills in your local pool. The physical motions are simple. The mental calm required to execute them under stress—that's what separates the tourists from the explorers.
Cave diving doesn't forgive shortcuts. The drills covered here aren't exciting. They won't make for a great Instagram reel. But they're the difference between a diver who survives a bad day and one who doesn't. Rehearse them. Respect them. Then—only then—drop below the surface and see what the cave has to show you.